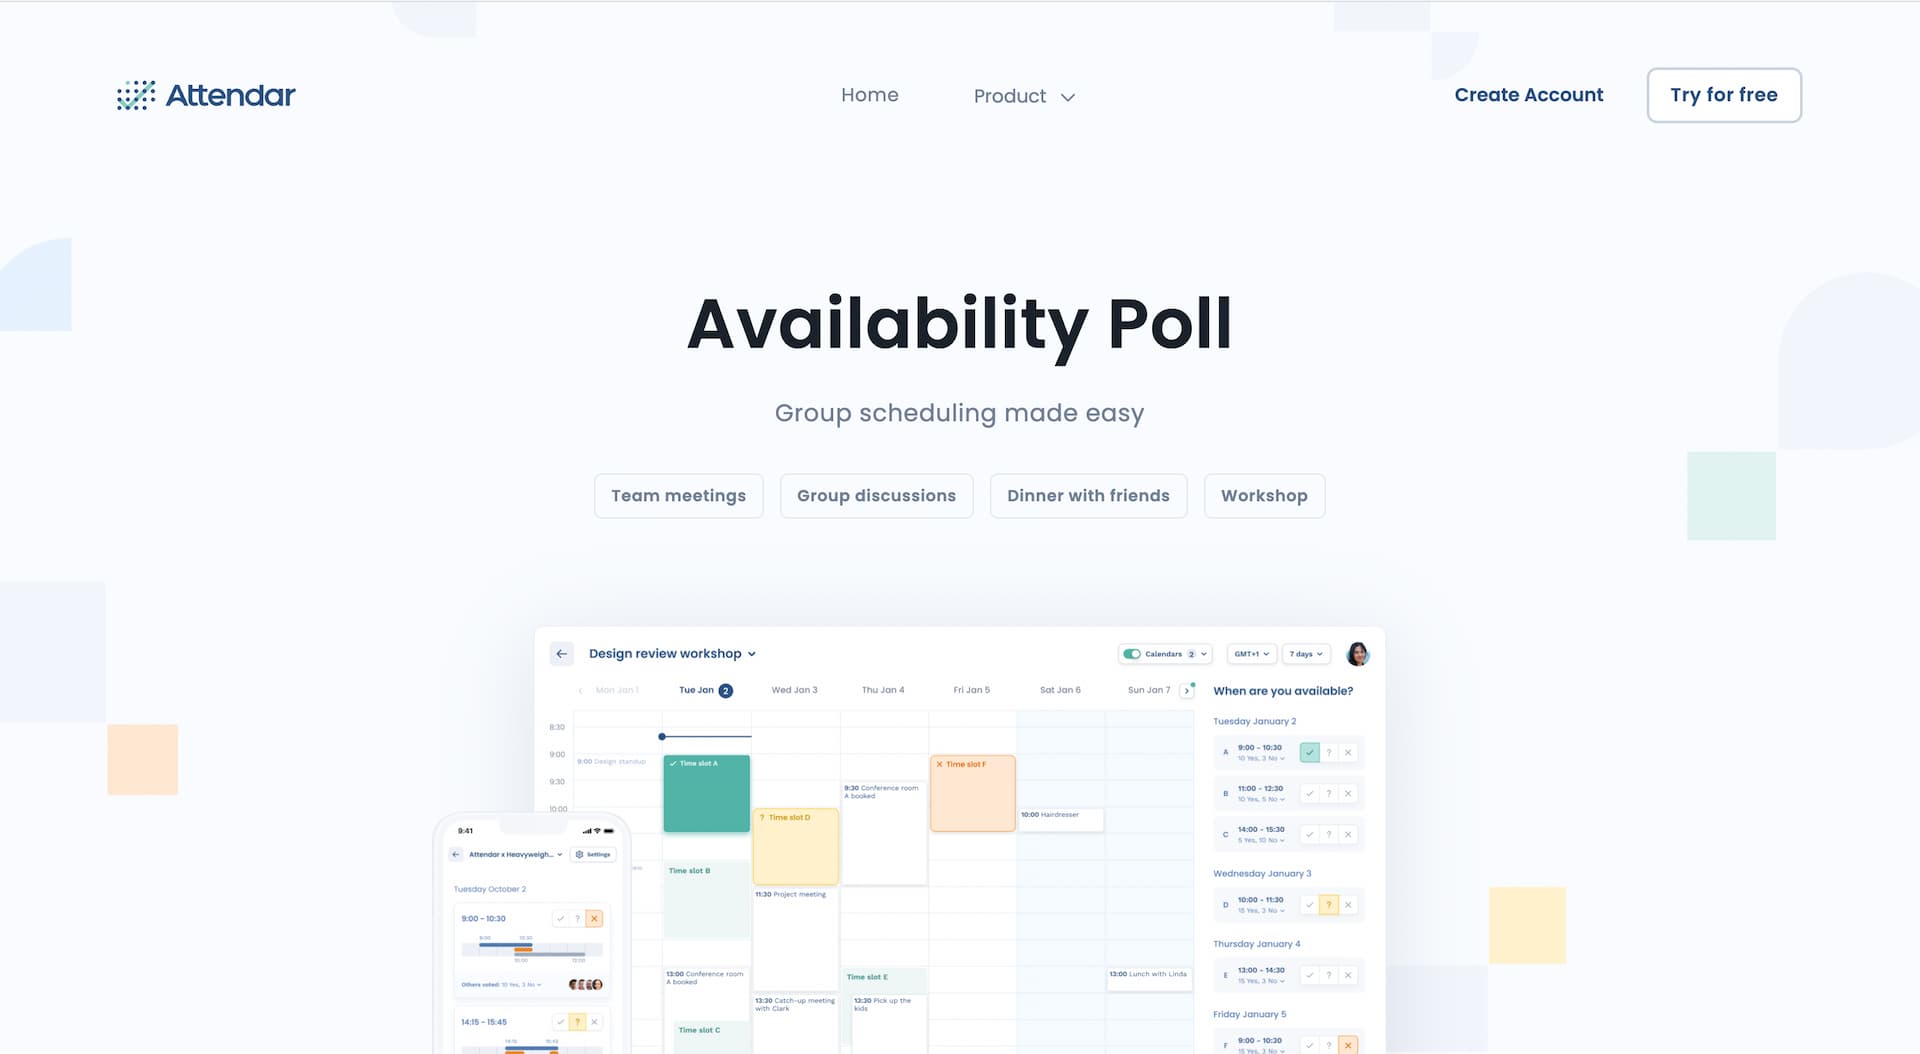
How to use Availability Poll for group scheduling with Attendar (it's free)
Step-by-step guide to creating meeting polls for your group scheduling. Lots of screenshots included.
Scheduling an event, meeting or party or whatever it may be, with multiple people could be a daunting task that sucks up not only your time but your energy.
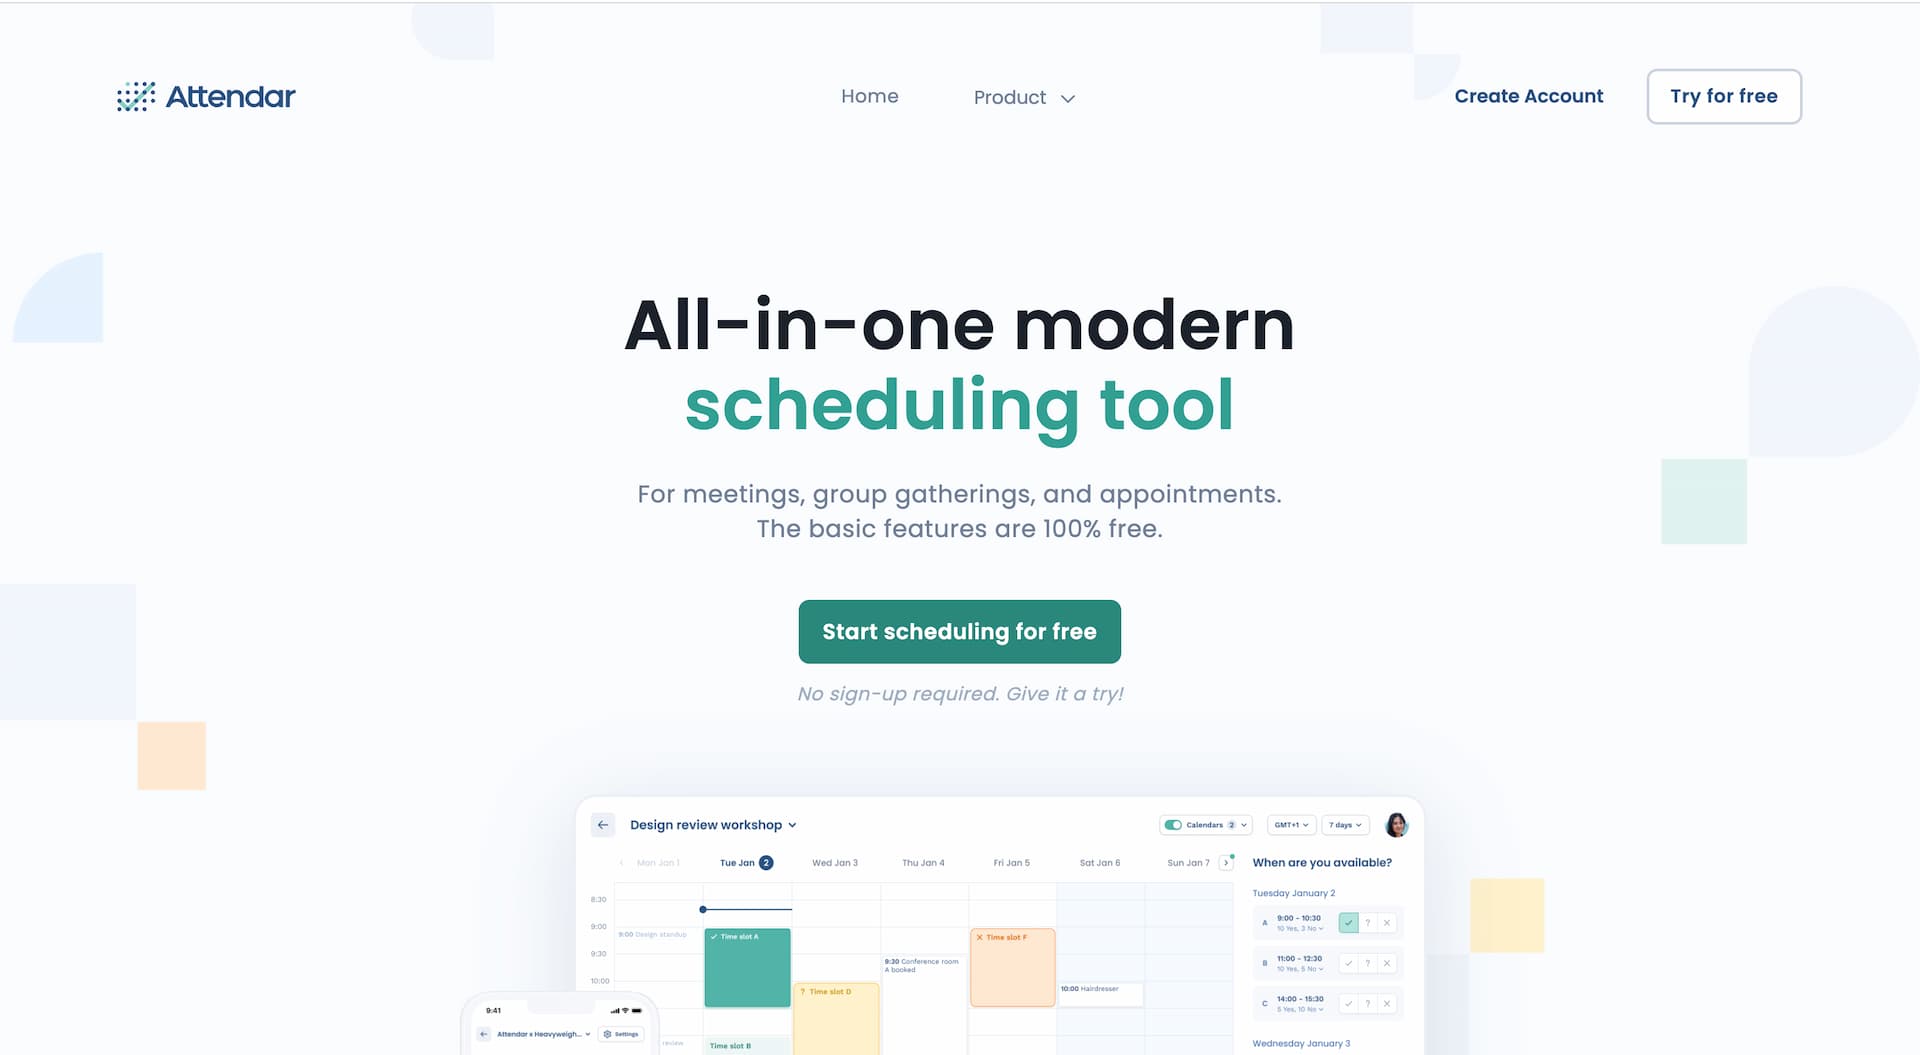
But with Attendar's Availability Poll, group scheduling can be much simpler and easy.
What's great about it is that anyone can use it for free, even without sign-up or email address.
The clean and intuitive design makes it suitable for both business and private use.
In this article, we guide you through how to create a group scheduling page, let people vote, and see their availabilities to find the time that works best for your group.
Let's go 👇
Creating a meeting poll
To start, visit Attendar's website and click Start scheduling for free button in the center.
Creating an account is completely optional. Feel free to try it out first as guest to see how this tool works 👍
Next, select Availability Poll on the right_._
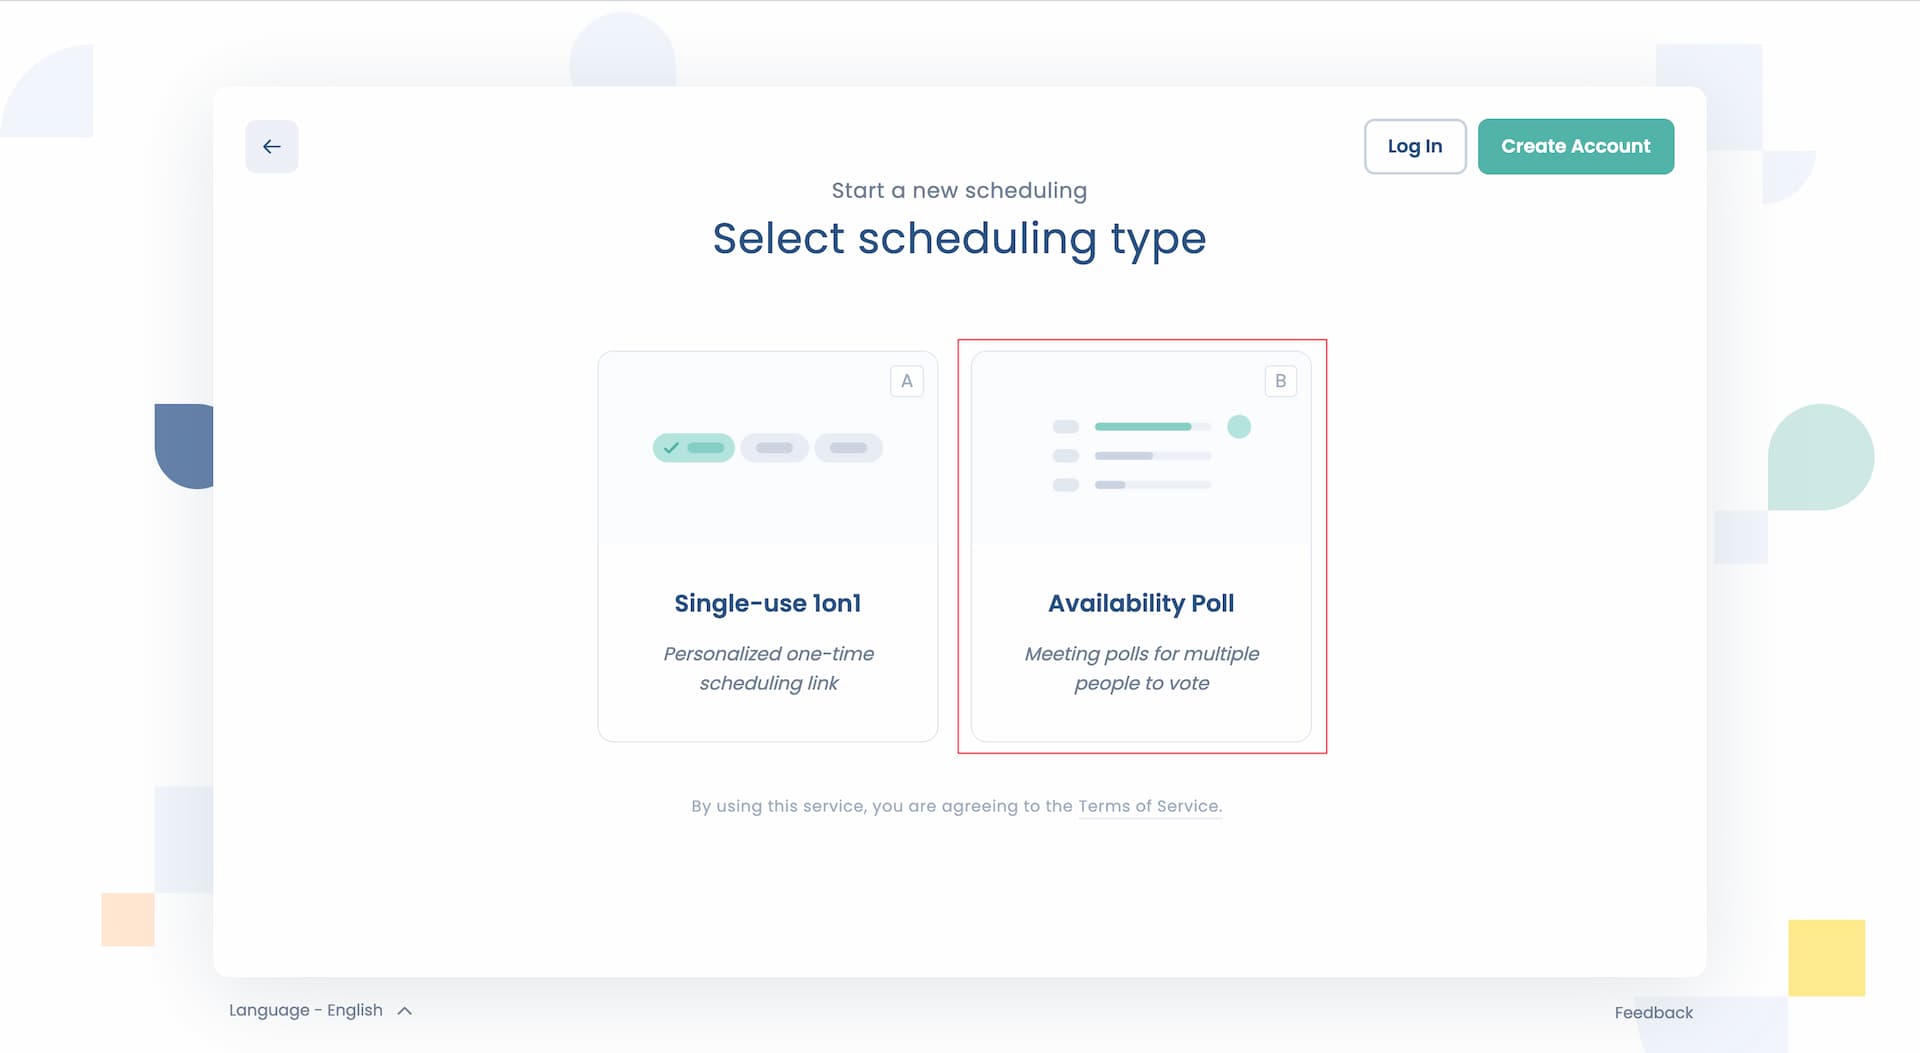
Ok, creating a meeting poll starts from here.
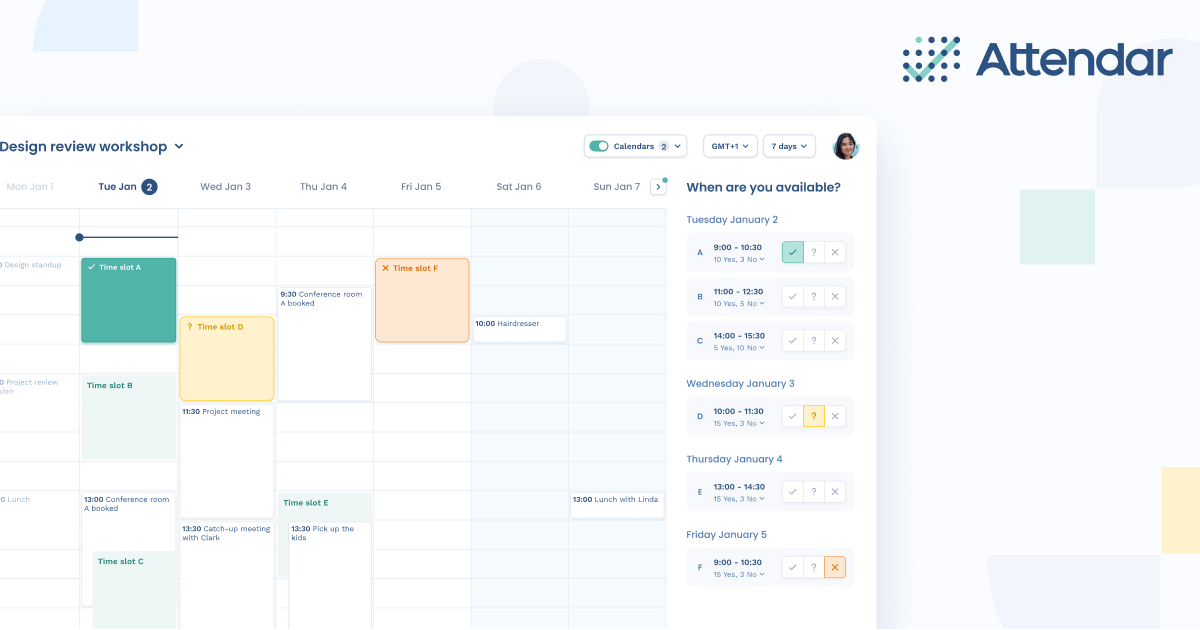
The screen below is what you'll see which consists of the left sidebar where you enter details of the event and the calendar in the center where you select a couple of times to propose.
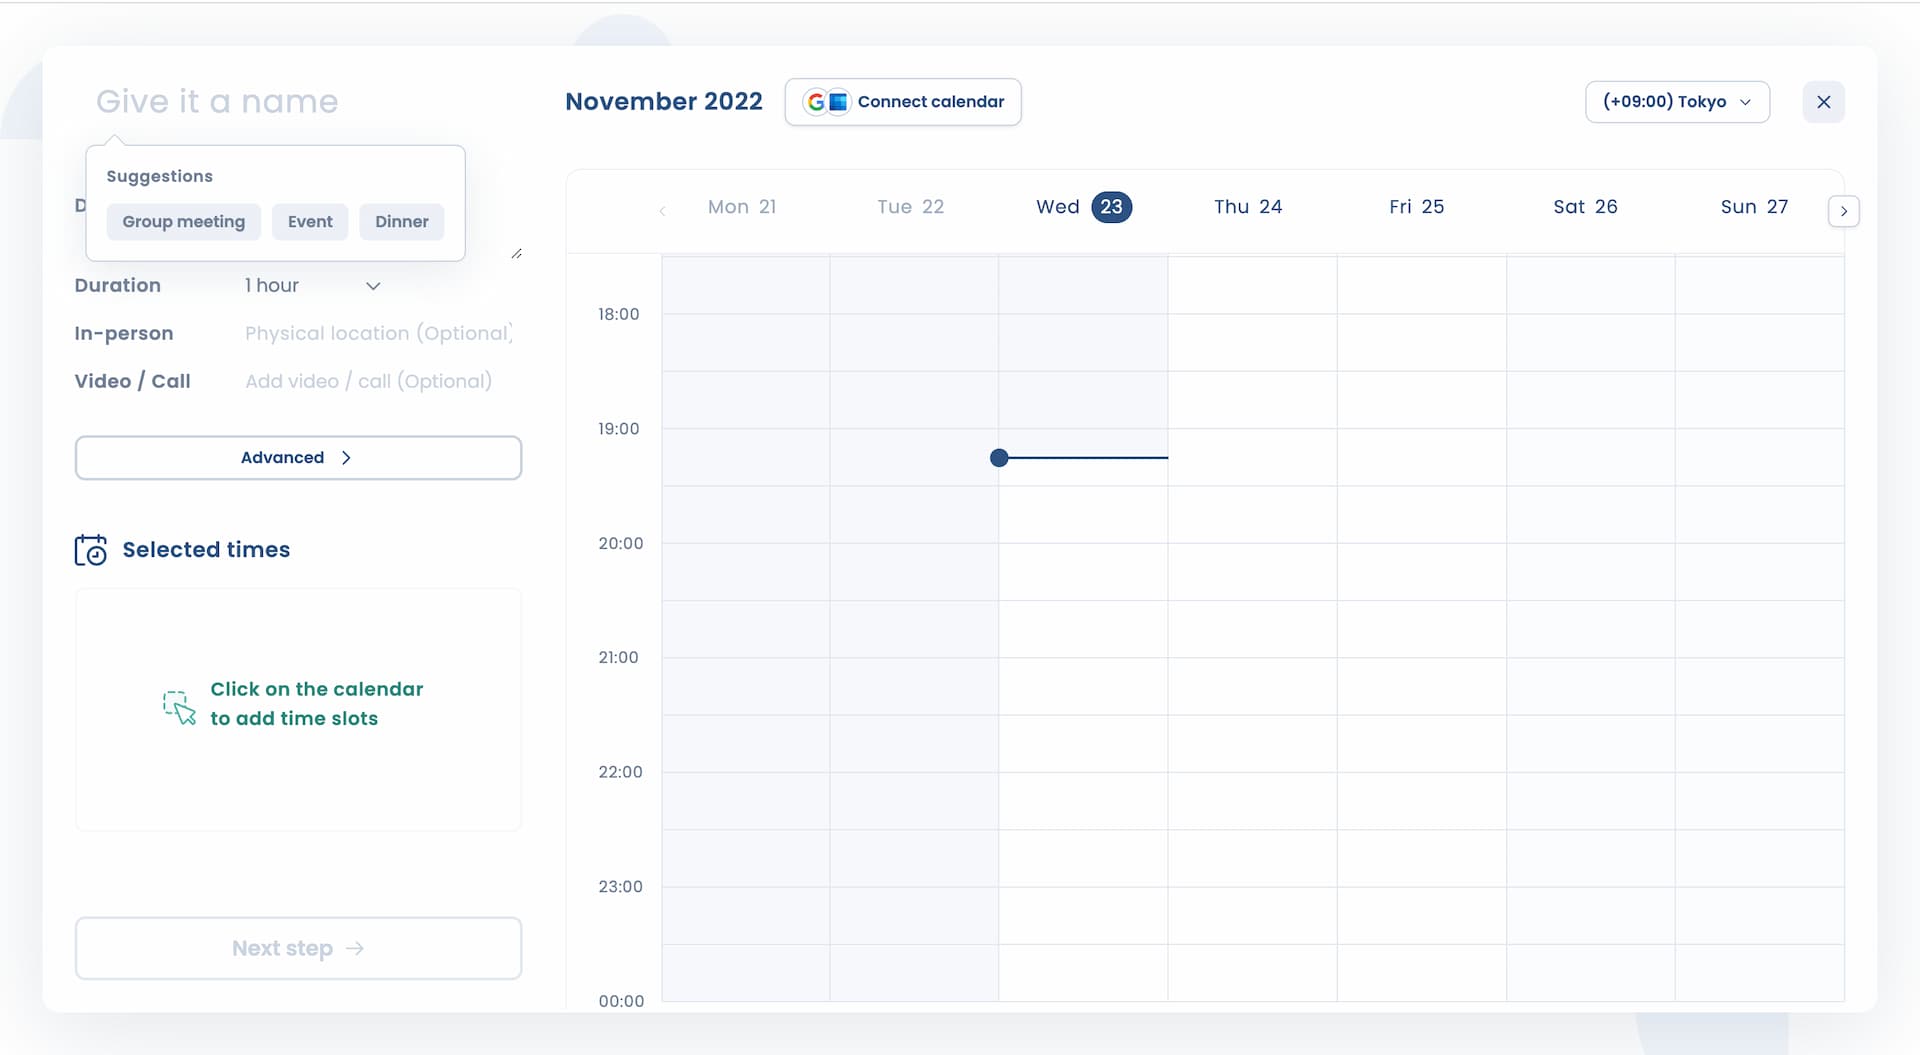
On the left sidebar, you can provide;
- Title
- Description
- Duration (select from pull-down menu)
- In-person (for face-to-face event)
- Video / Call (for online / remote event)
But Description and Location (both In-person and Video / Call) are optional.
FYI, you are able to select both In-person and Video / Call for hybrid events.
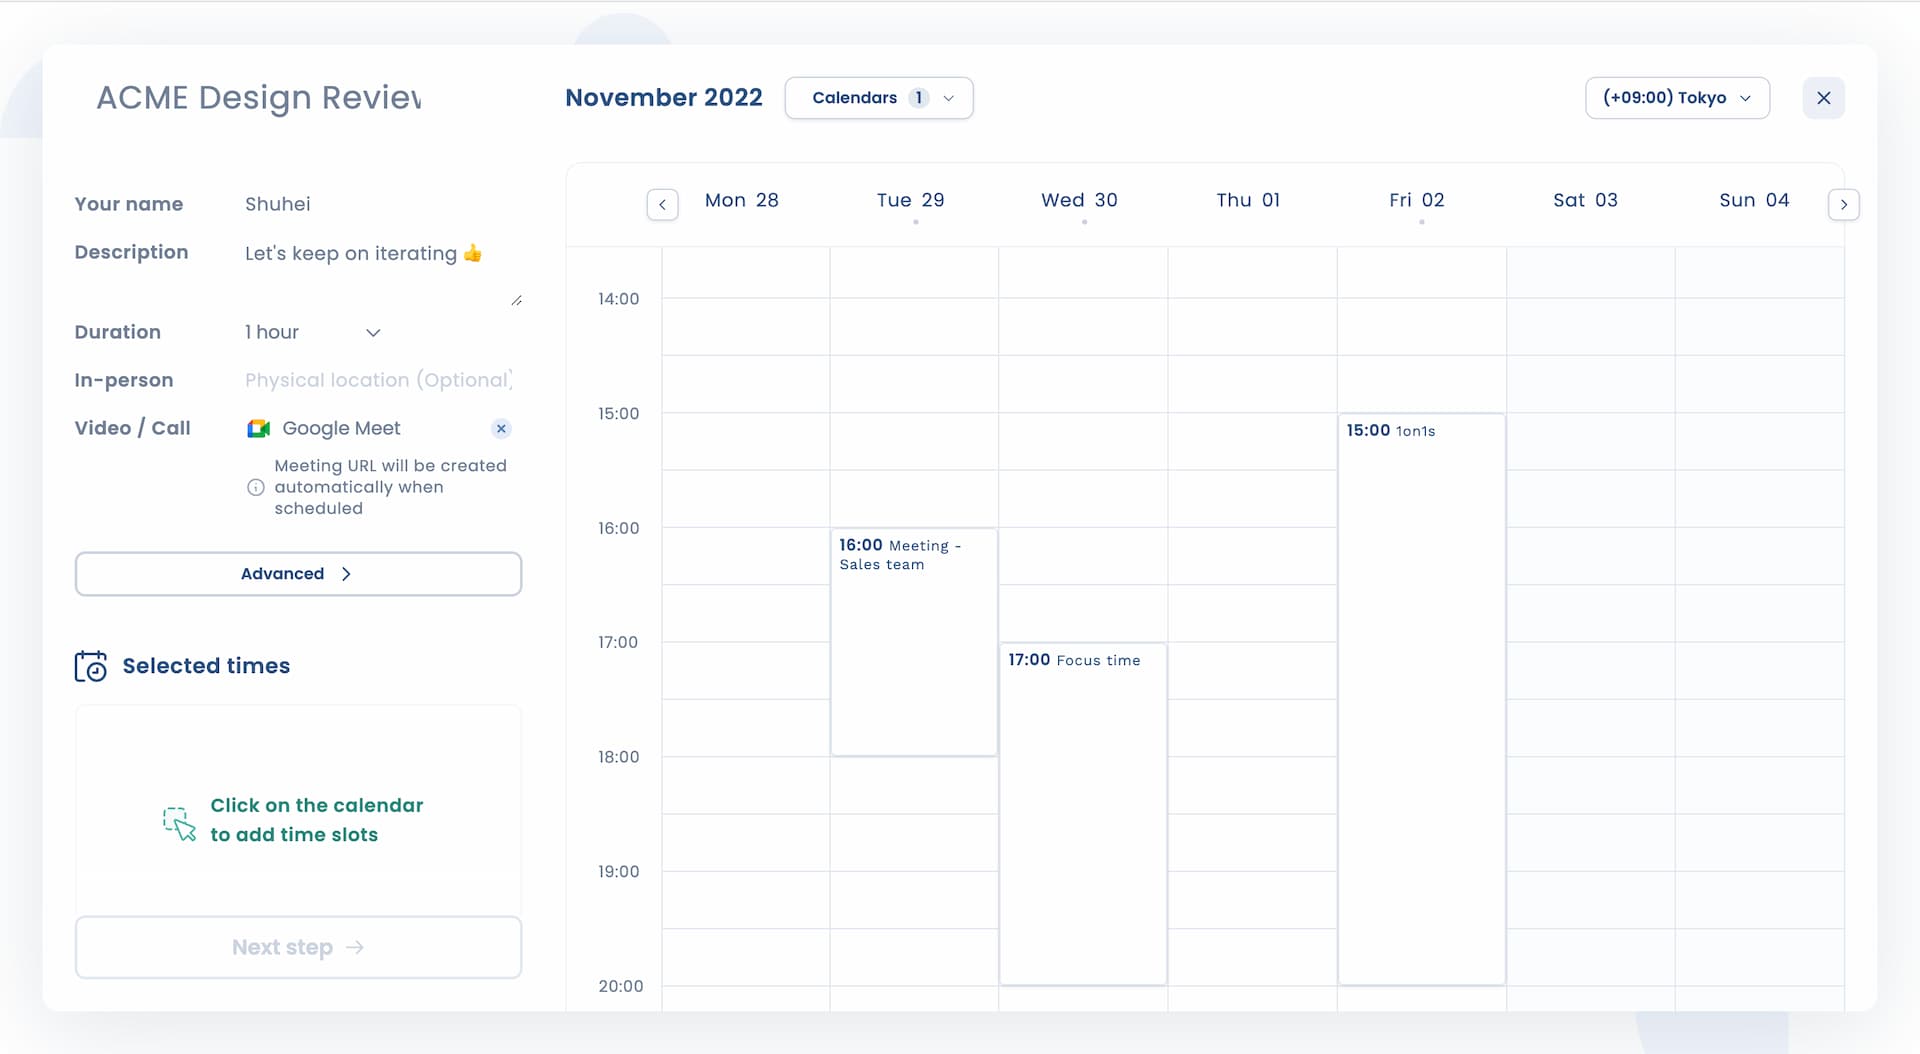
By connecting your Google Meet or Zoom account, Attendar will automatically create a meeting URL for you when the event is scheduled.
Below is what it looks when the details are entered and logged in to an Attendar account with Google Calendar + Meet connected.
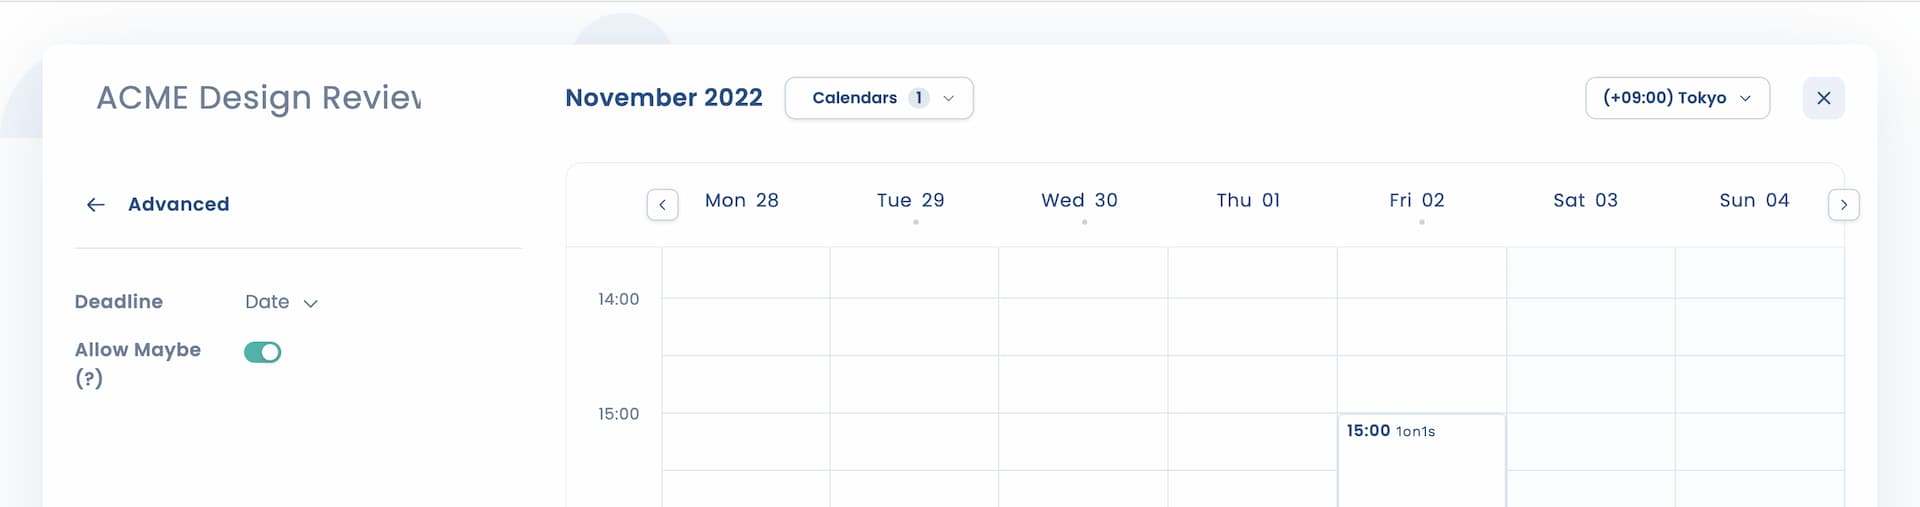
If you open the Advanced panel, you get to set things like;
- voting deadline
- allow / disallow Maybe (?) as a vote option
*We might add more options over time.
Great, now we get to the most important part; Select times to propose 🗓
All you have to do is click on the calendar to select times you want your group to vote for. Simple as that. The selected times will show up on the left sidebar as well.
And when it's done, it looks like this 👇

If needed, you can also drag to stack two or more times like 13:00 - 14:00 & 13:30 - 14:30.
If you want to overlap two or more times ike 13:00 - 14:00 & 13:30 - 14:30, you can do so by dragging a block over to the other.
If you create an Attendar account and connect your calendar app (Google Calendar or/and Outlook Calendar), you can overlay your own events on the calendar which makes it easy to see when you are available.
Last step is the comment section or questions to spice up your meeting poll.
This is completely optional but allows you to create a survey or questionnaire to gather information from the participants when they vote.
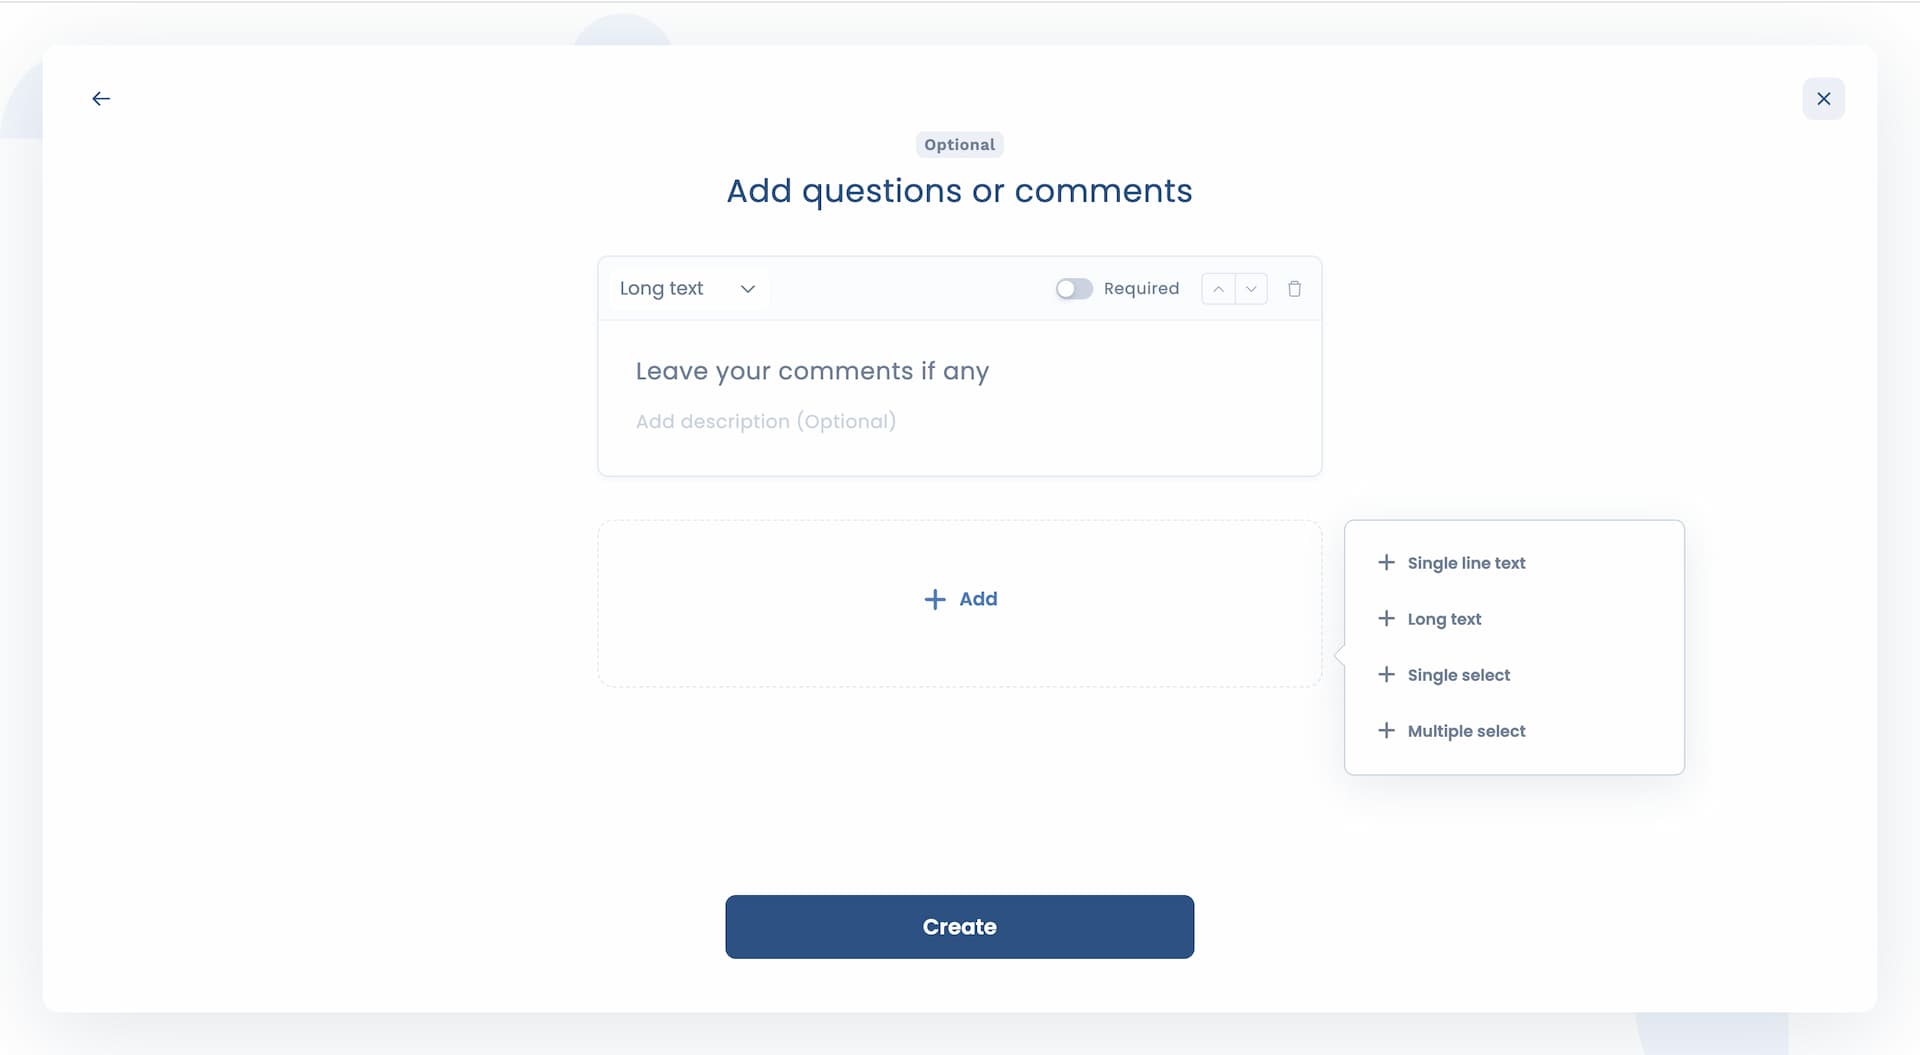
By default, you have a comment section but you can delete it if you don't need it.
You can click Add to create your own question. Just like any other form builder, we have the following options for the type of question.
- Single line text
- Long text
- Single select
- Multiple select
For instance, below is Single-select option added.
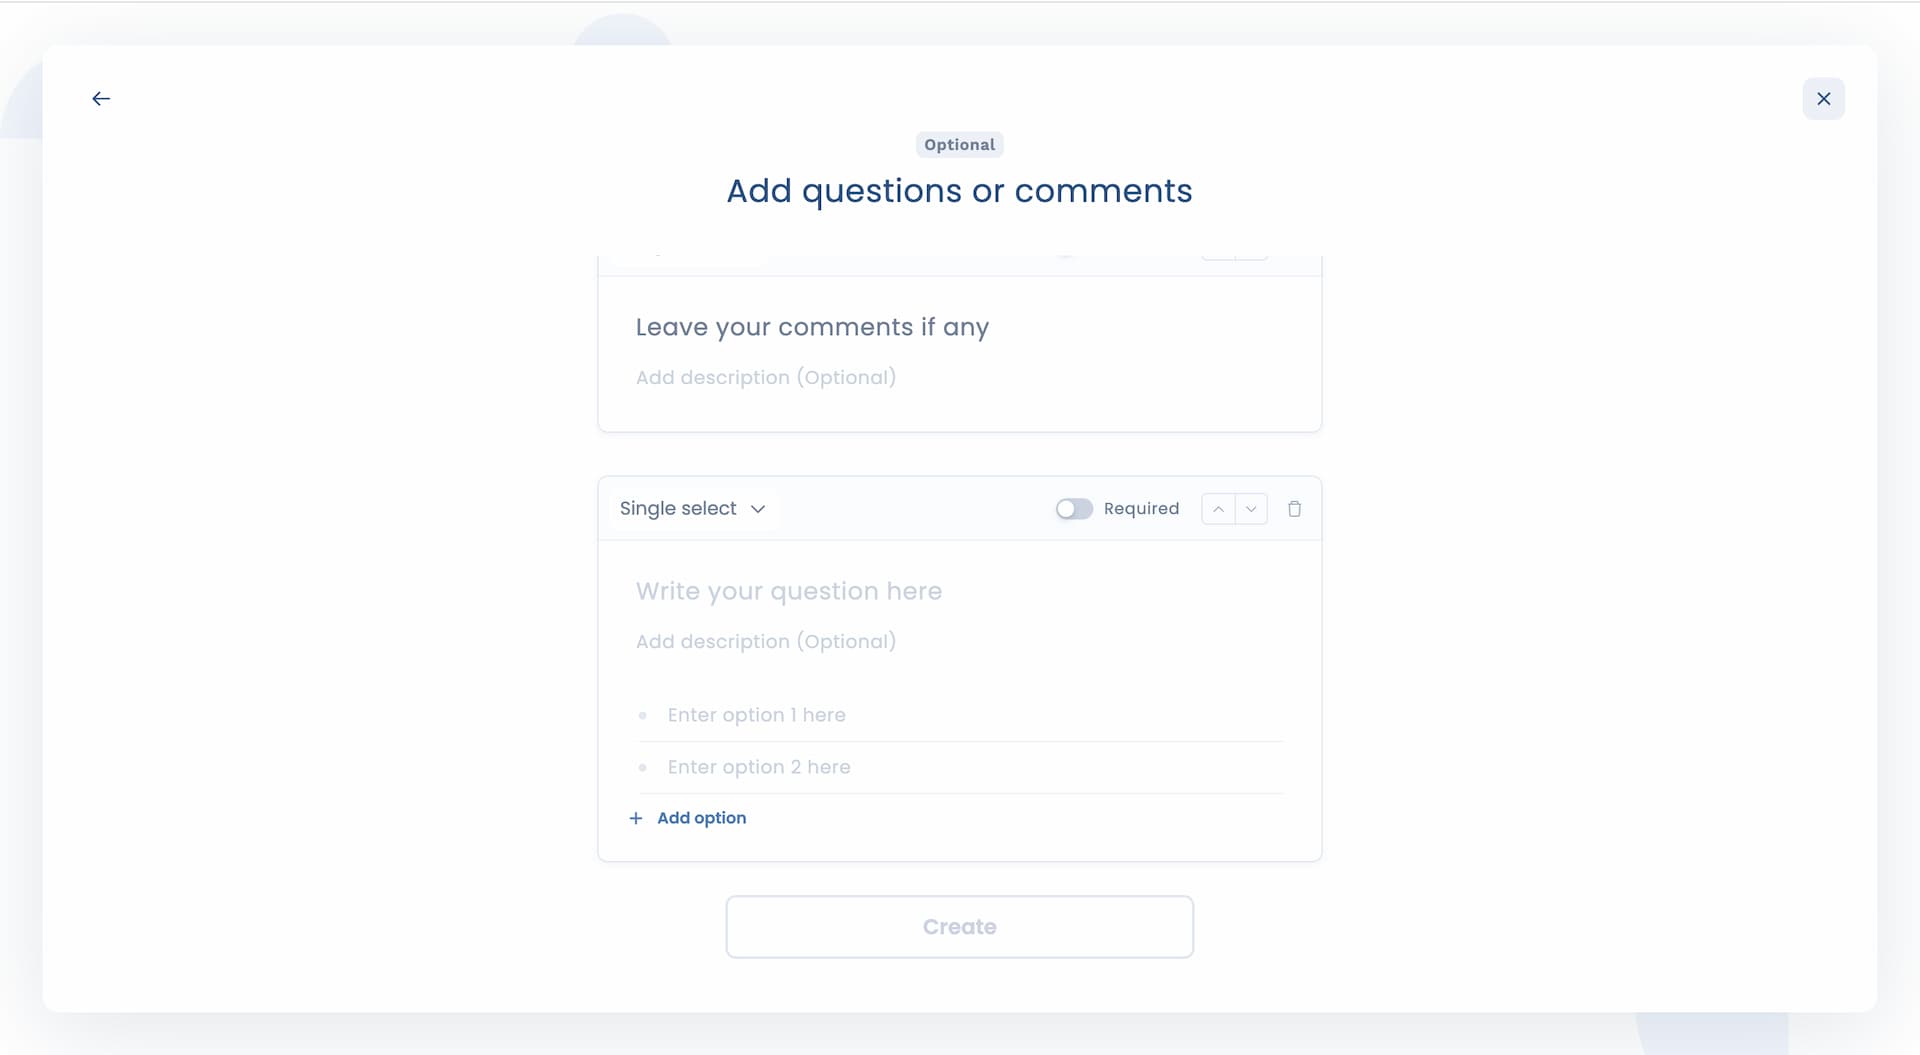
Again, this step is optional.
Alright, you've completed the availability poll creation process at this point. Hit Create and it will generate the scheduling poll page for you.
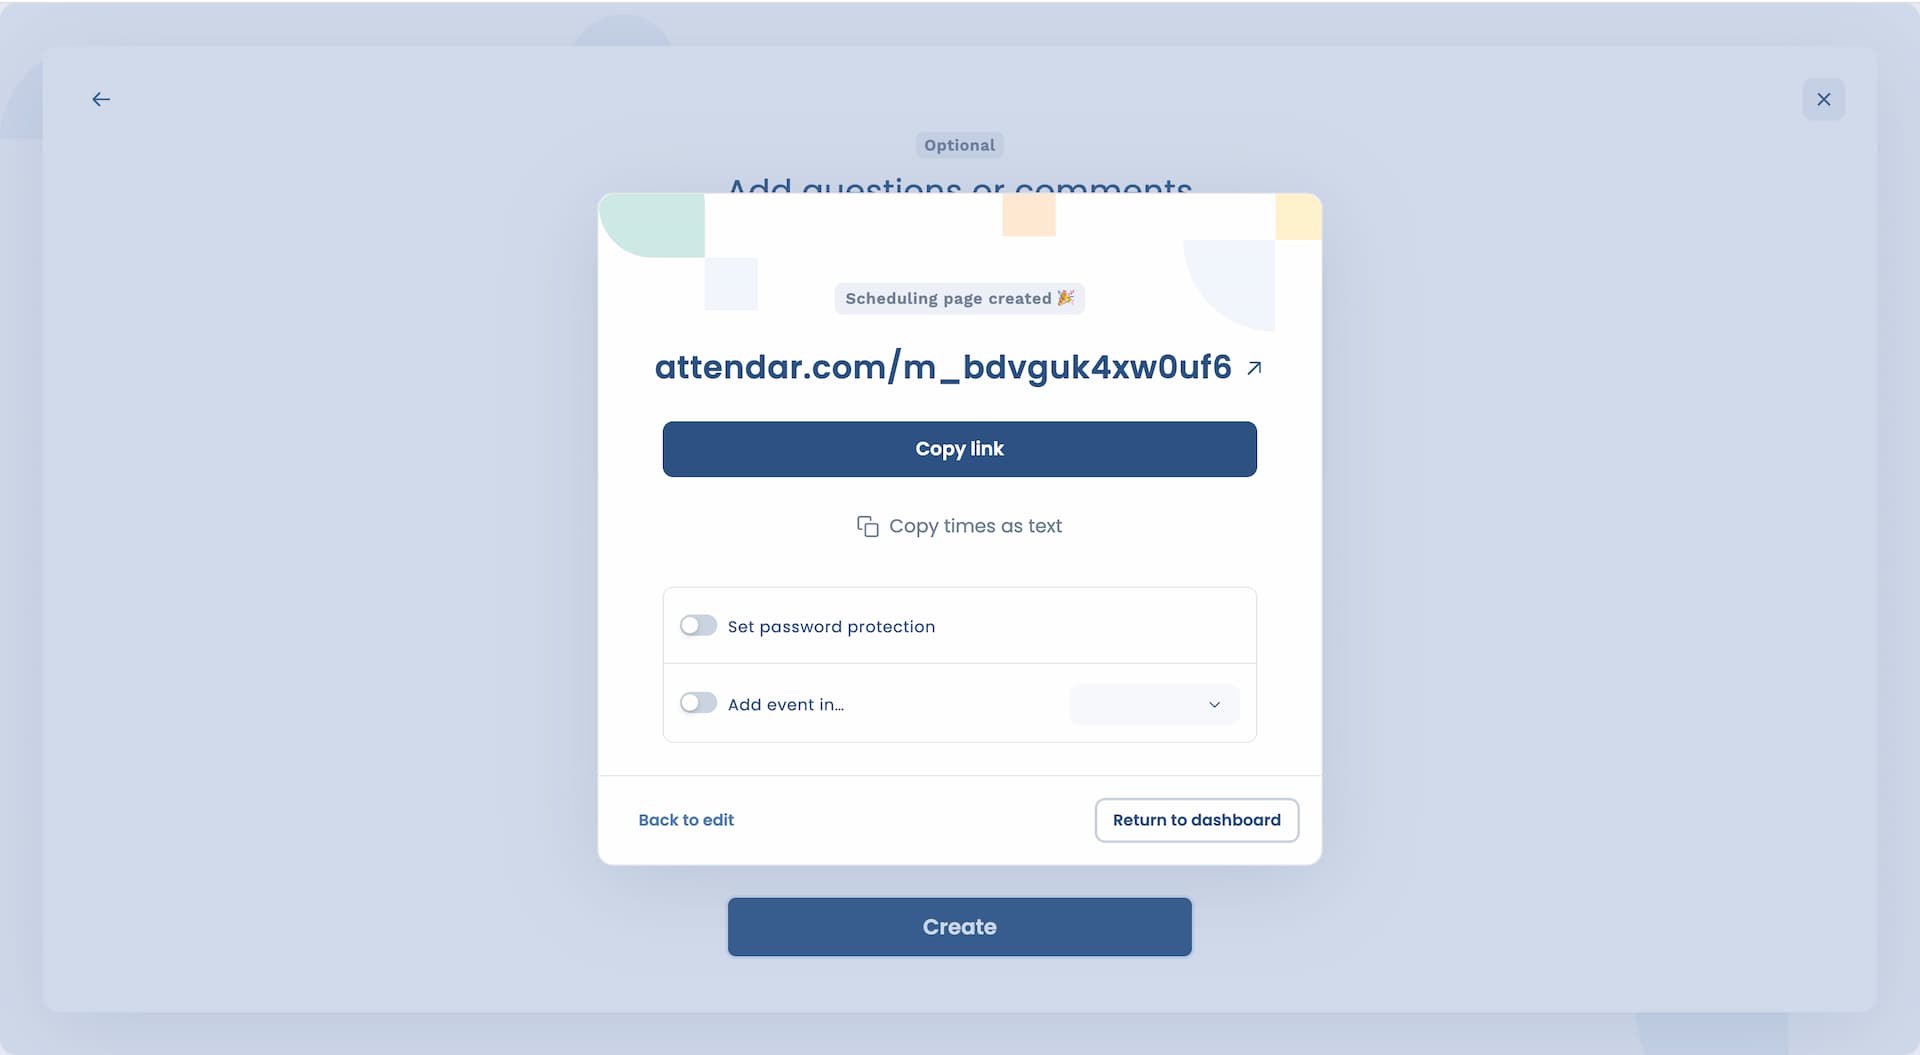
Copy the link and share it with your group to start voting.
You can also set a password for the scheduling page if want to (Attendar account required.)
How to vote on scheduling poll ✅
Voting on times is intuitive and dead simple.
We have demo page for you to touch and feel!
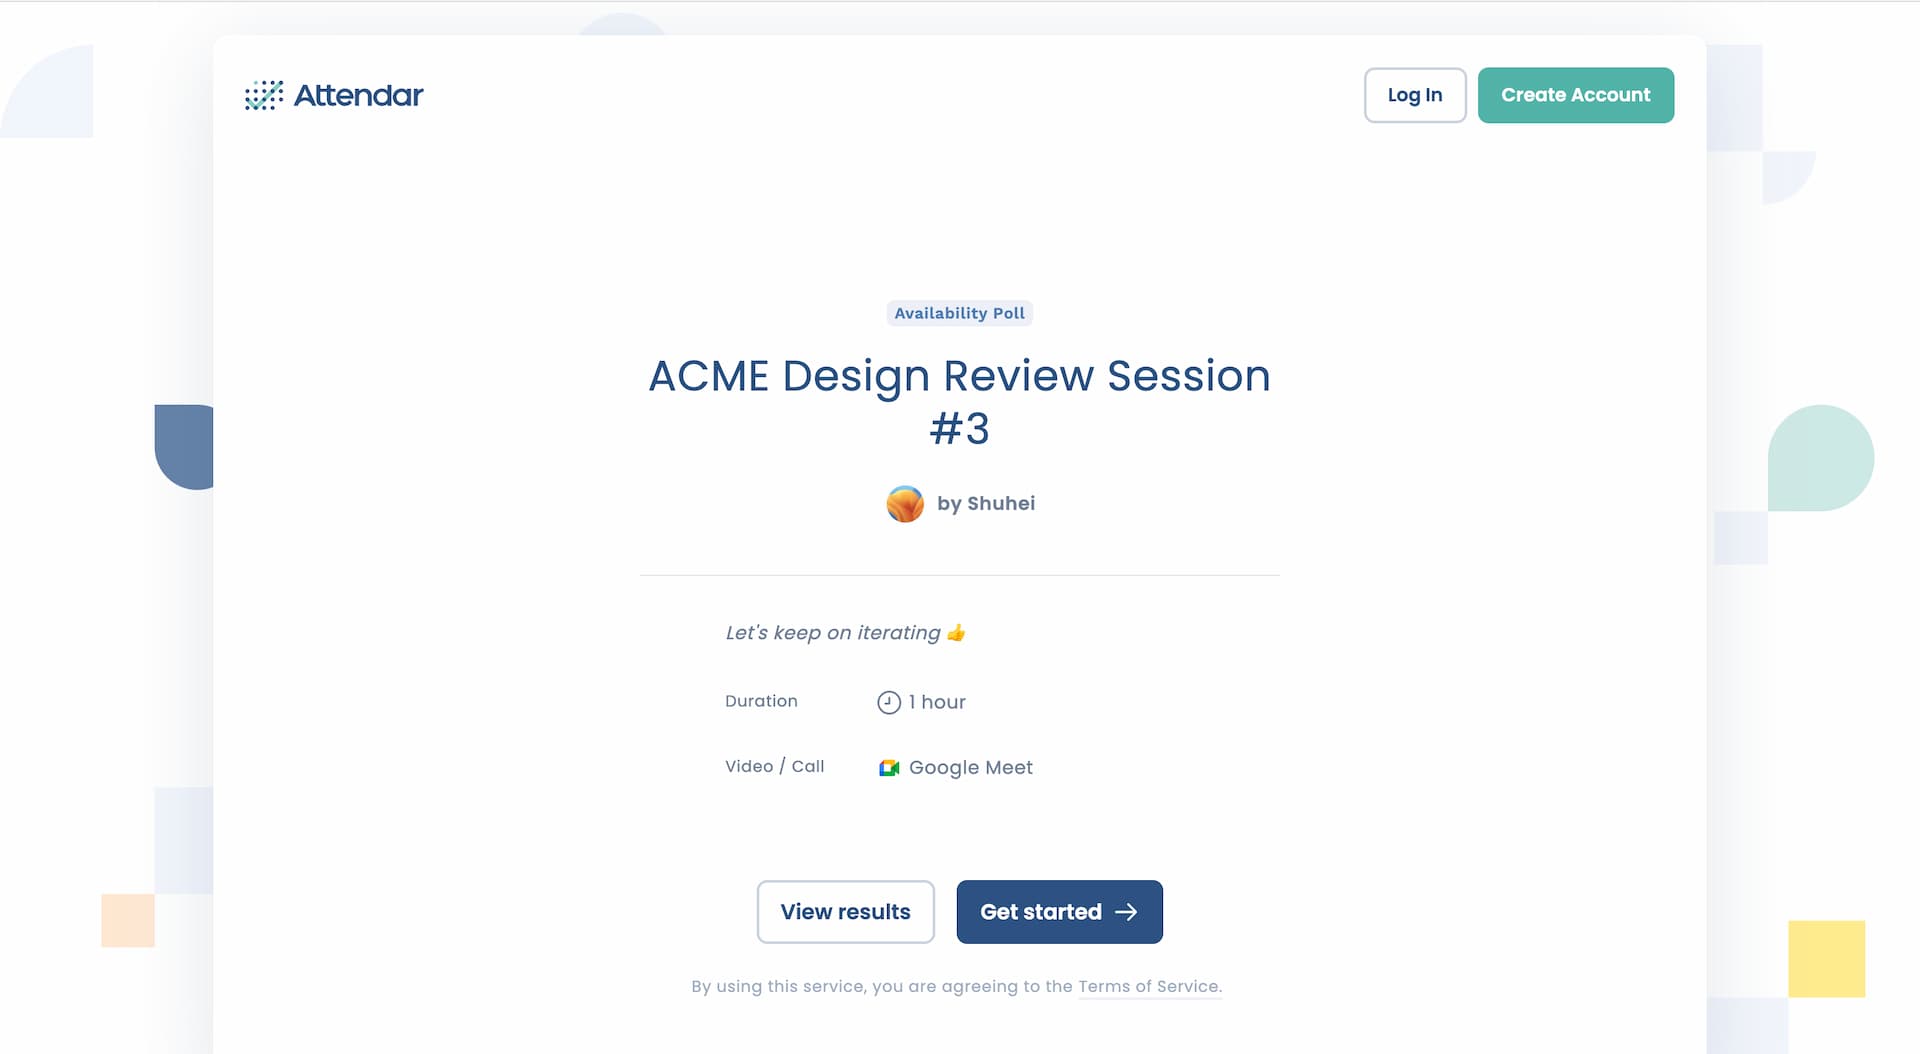
When you access the meeting poll page, first thing you see is the details of the event. It gives you an overview of the event at a glance. To start voting, simply click Get started.
Also, from this page you can always check the progress on the poll by clicking View results.
The next screen is where you actually vote on the times that work for you.
You can respond to each time slot either by clicking the light-green blocks on the calendar or by selecting_✓ (Yes),? (Maybe)_, or ╳ (No) on the right sidebar.
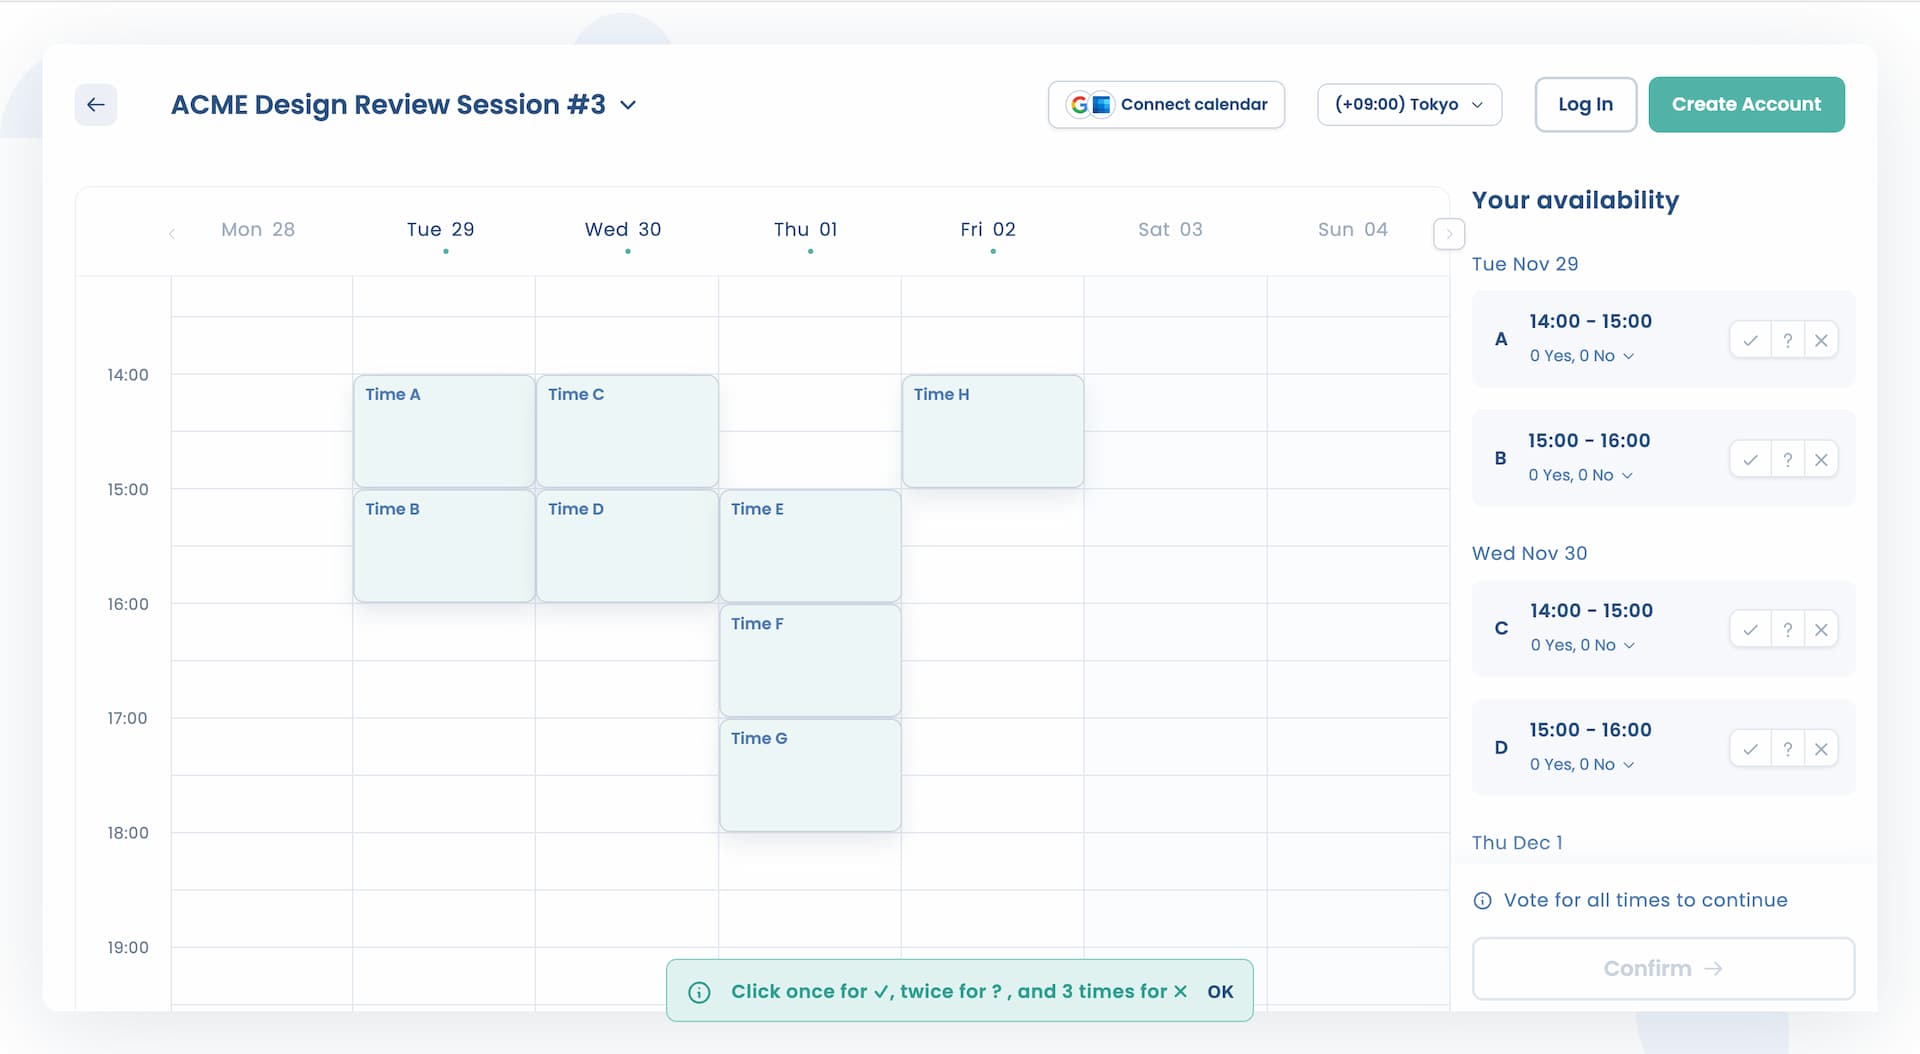
(When clicking blocks on the calendar, one click makes it Yes, click twice is Maybe, and click three times to make it No.)
When all the time options are voted, the page looks like this.
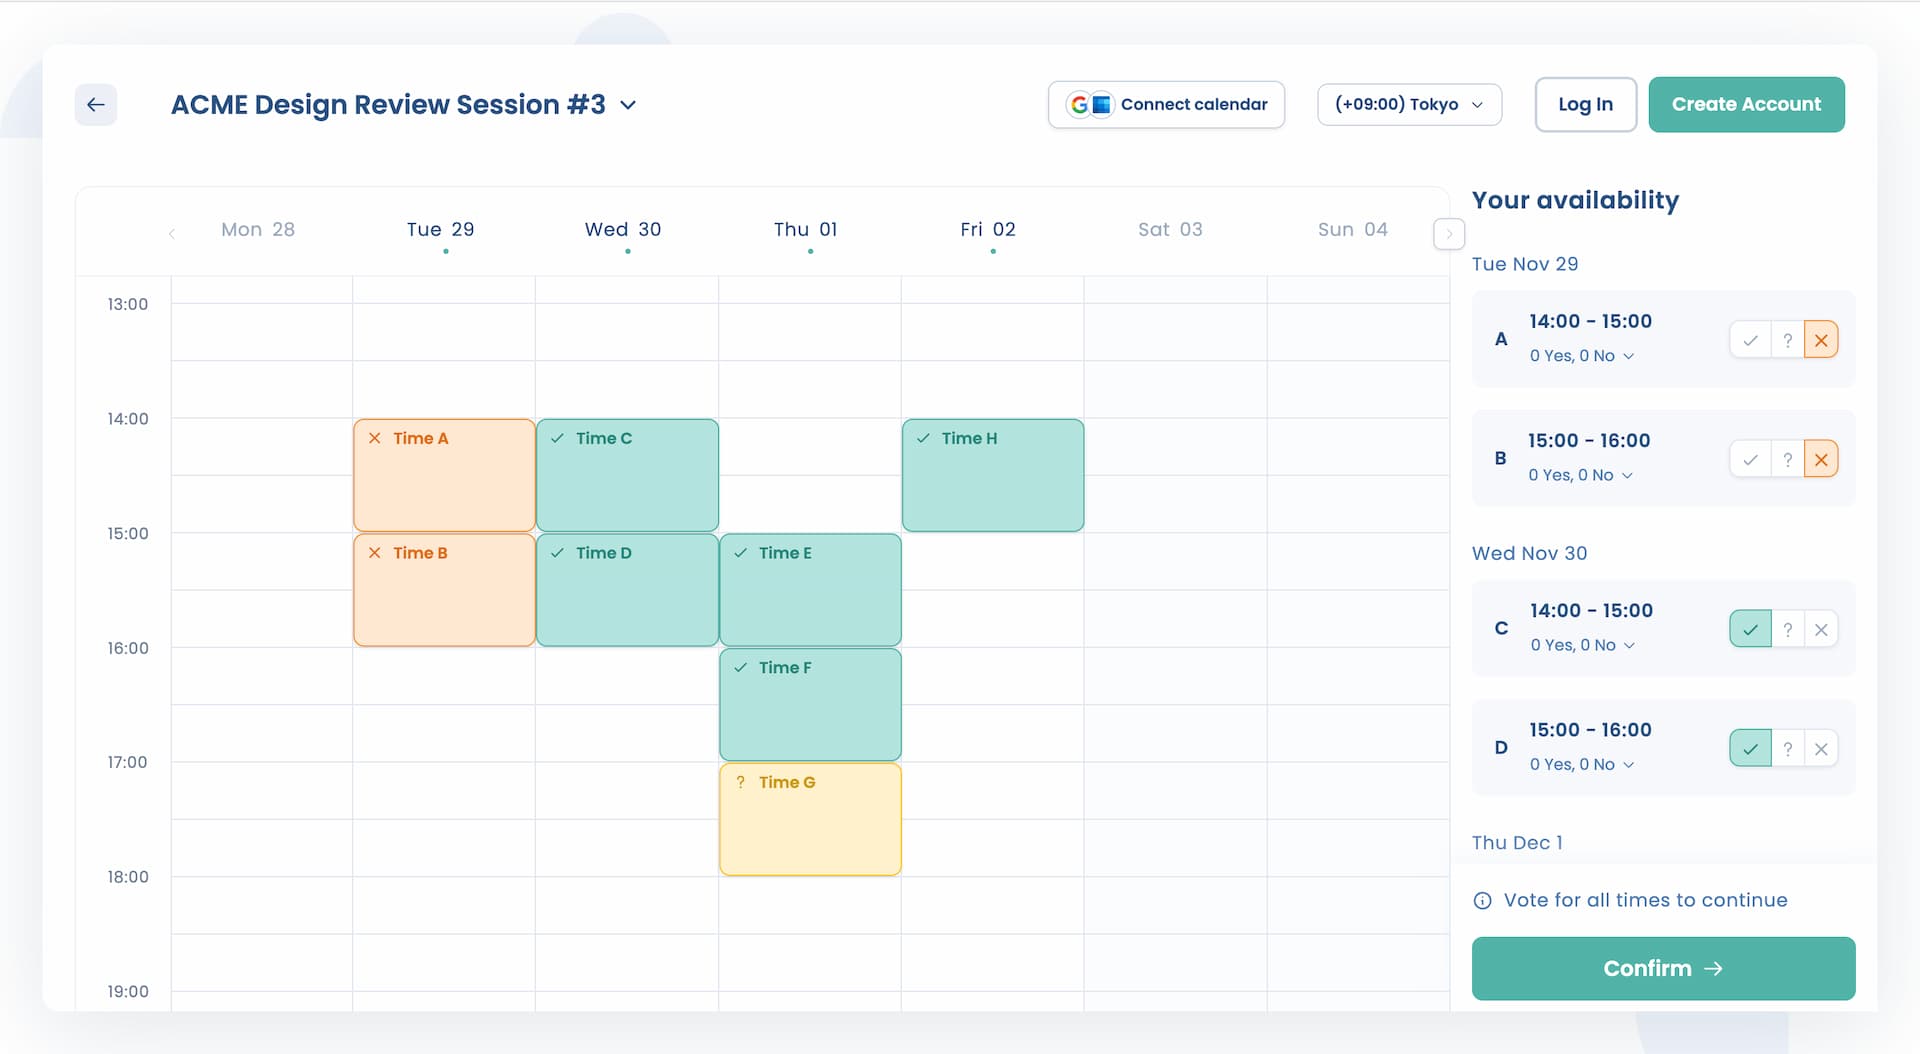
Your results are colored for clarity.
If you have an Attendar account and your calendar app is connected, your existing events from that calendar will be displayed on the calendar, making it easy to check whether you are available or not.
Once completed, hit Confirm.
This is the very last part where you enter your name, and answer the question(s) if any.
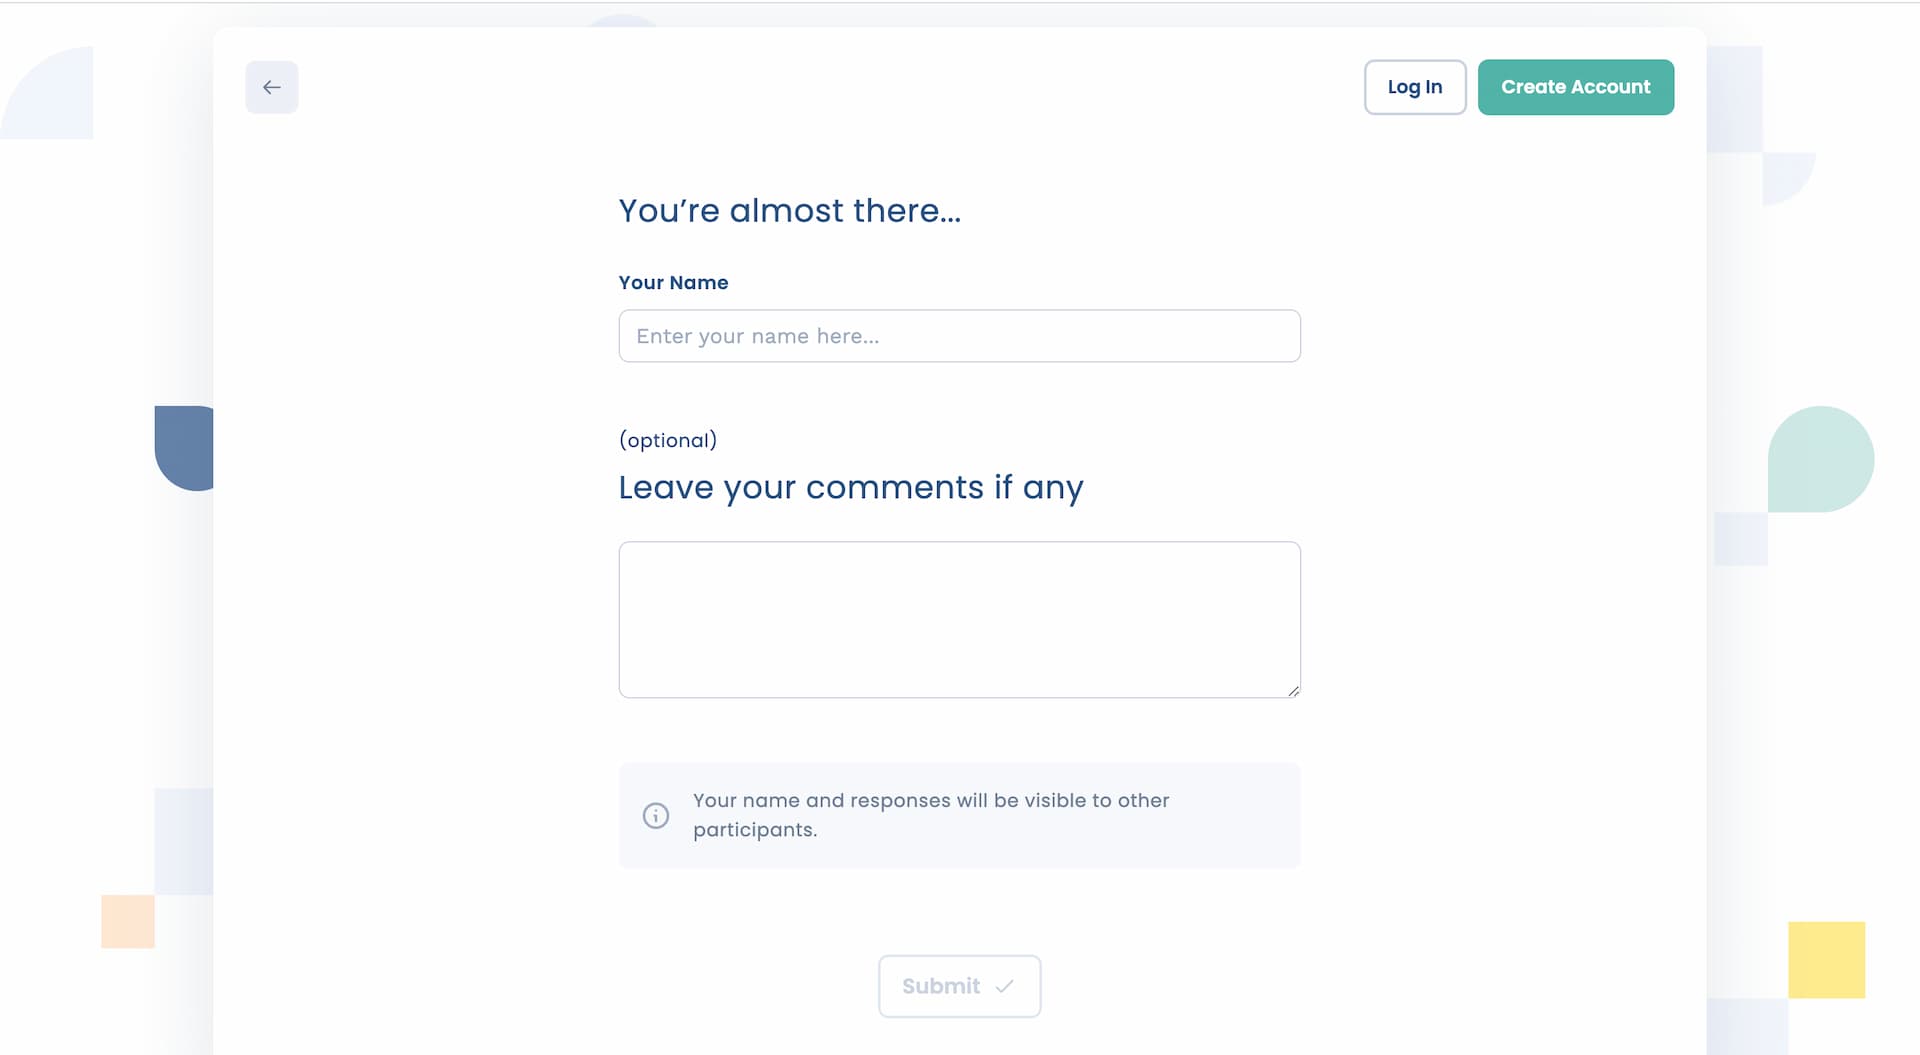
If it looks all good, hit Submit and you are done 🎉
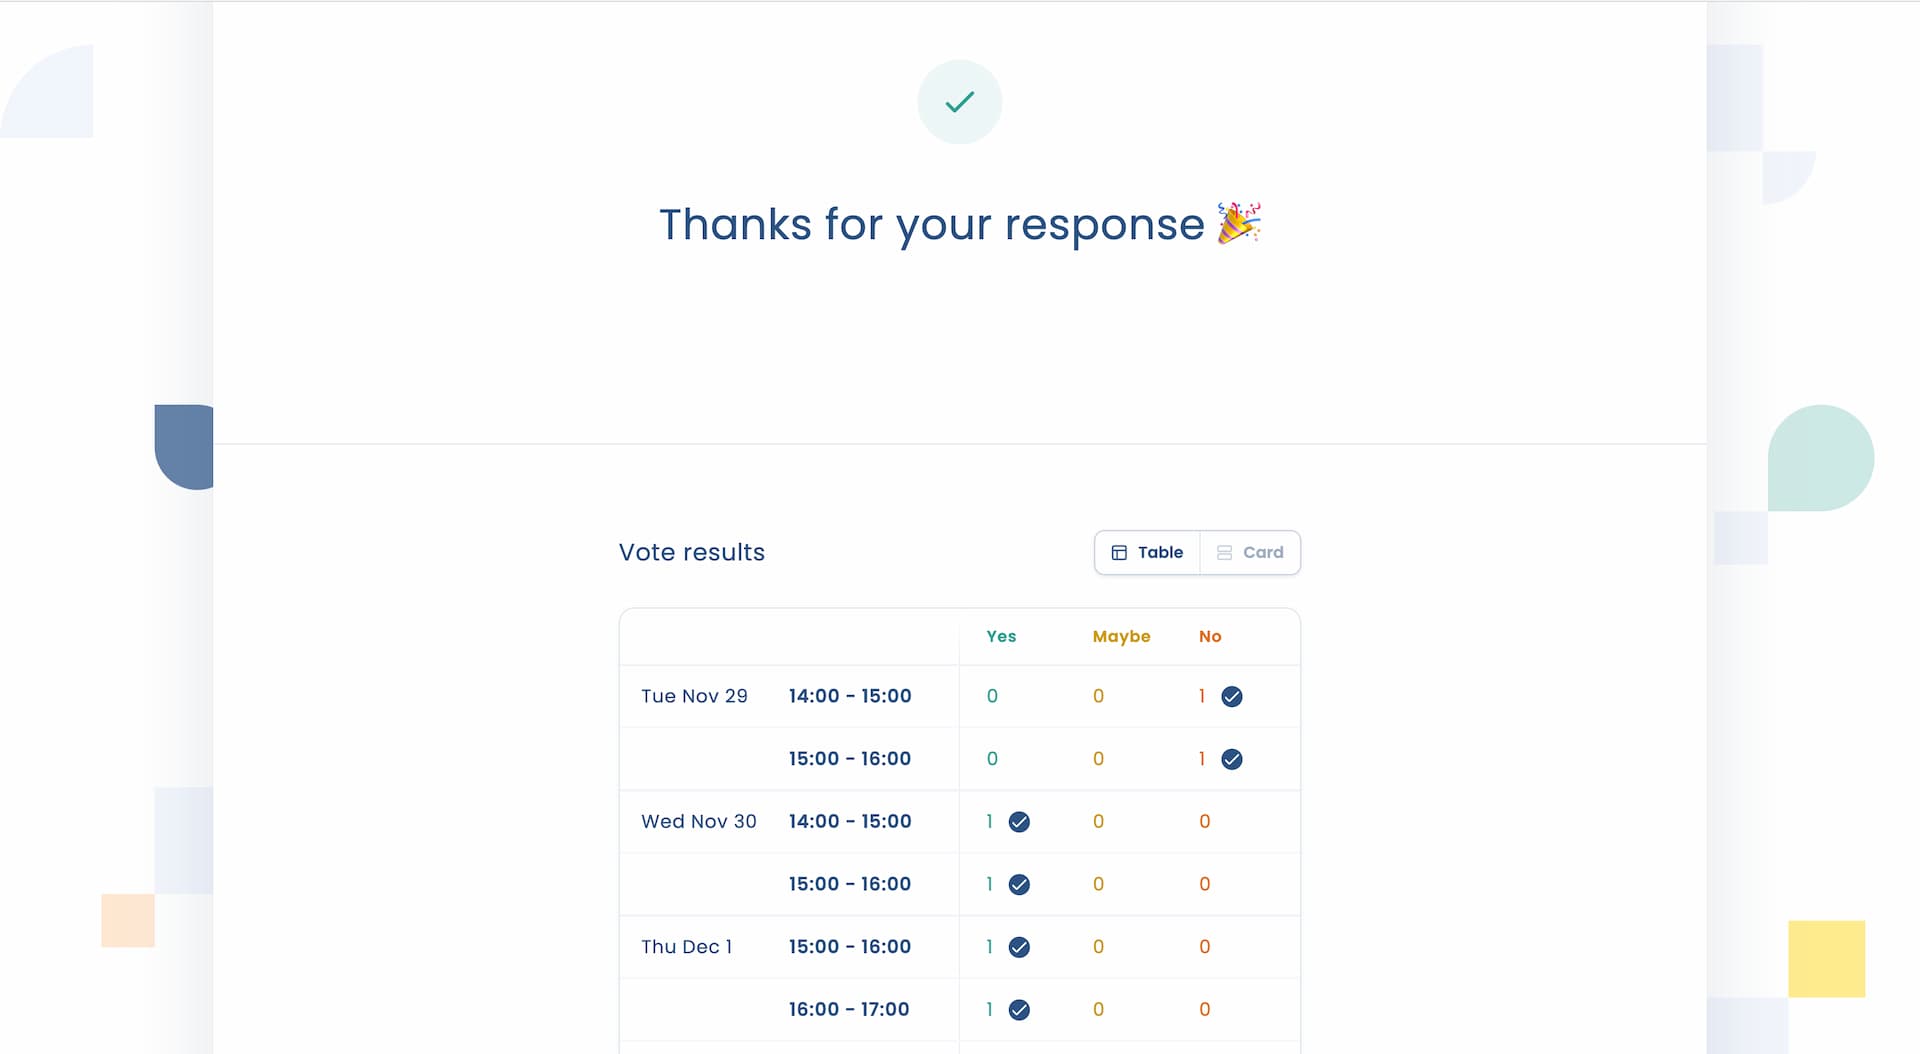
Once submitted, you can see the voting resutls at that point including yours highlighted.
You can safely refresh the page to go back to the overview page you saw at first.
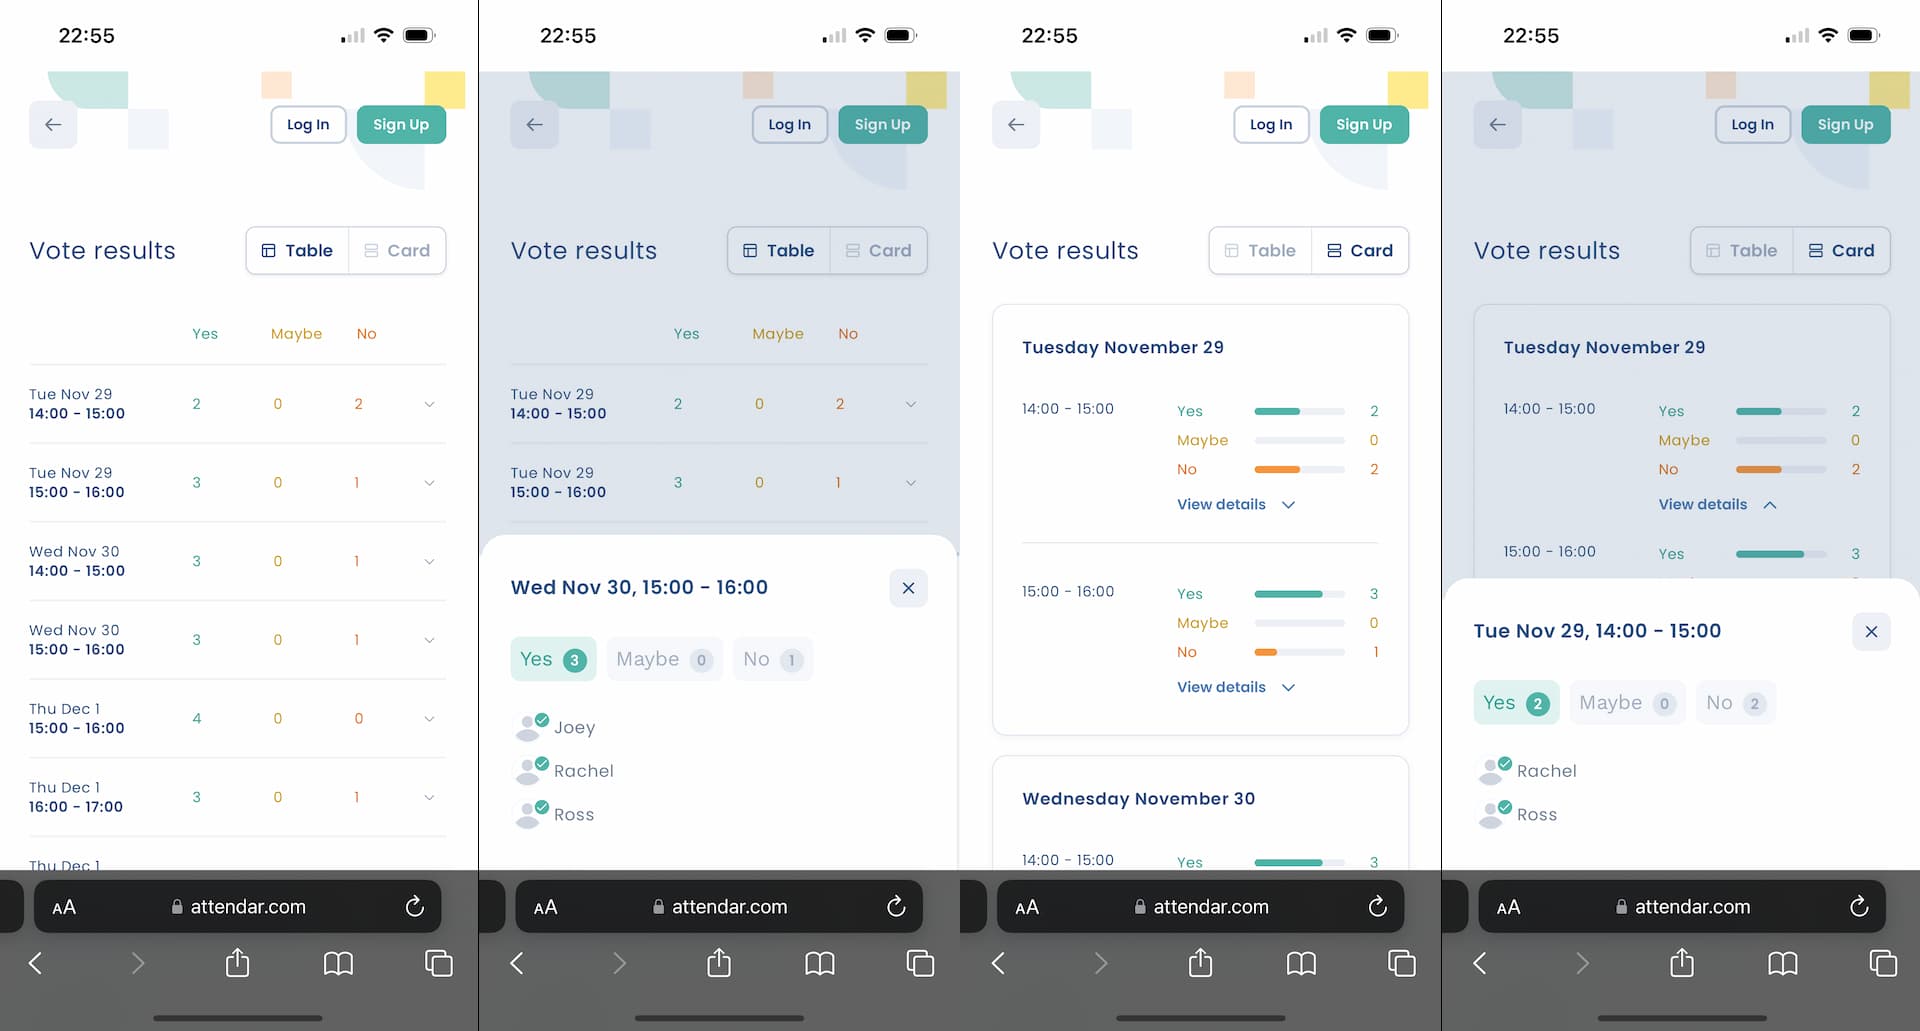
Checking results
When you click View results button on the overview page, it shows the collected votes beautifully followed by the collected answers.
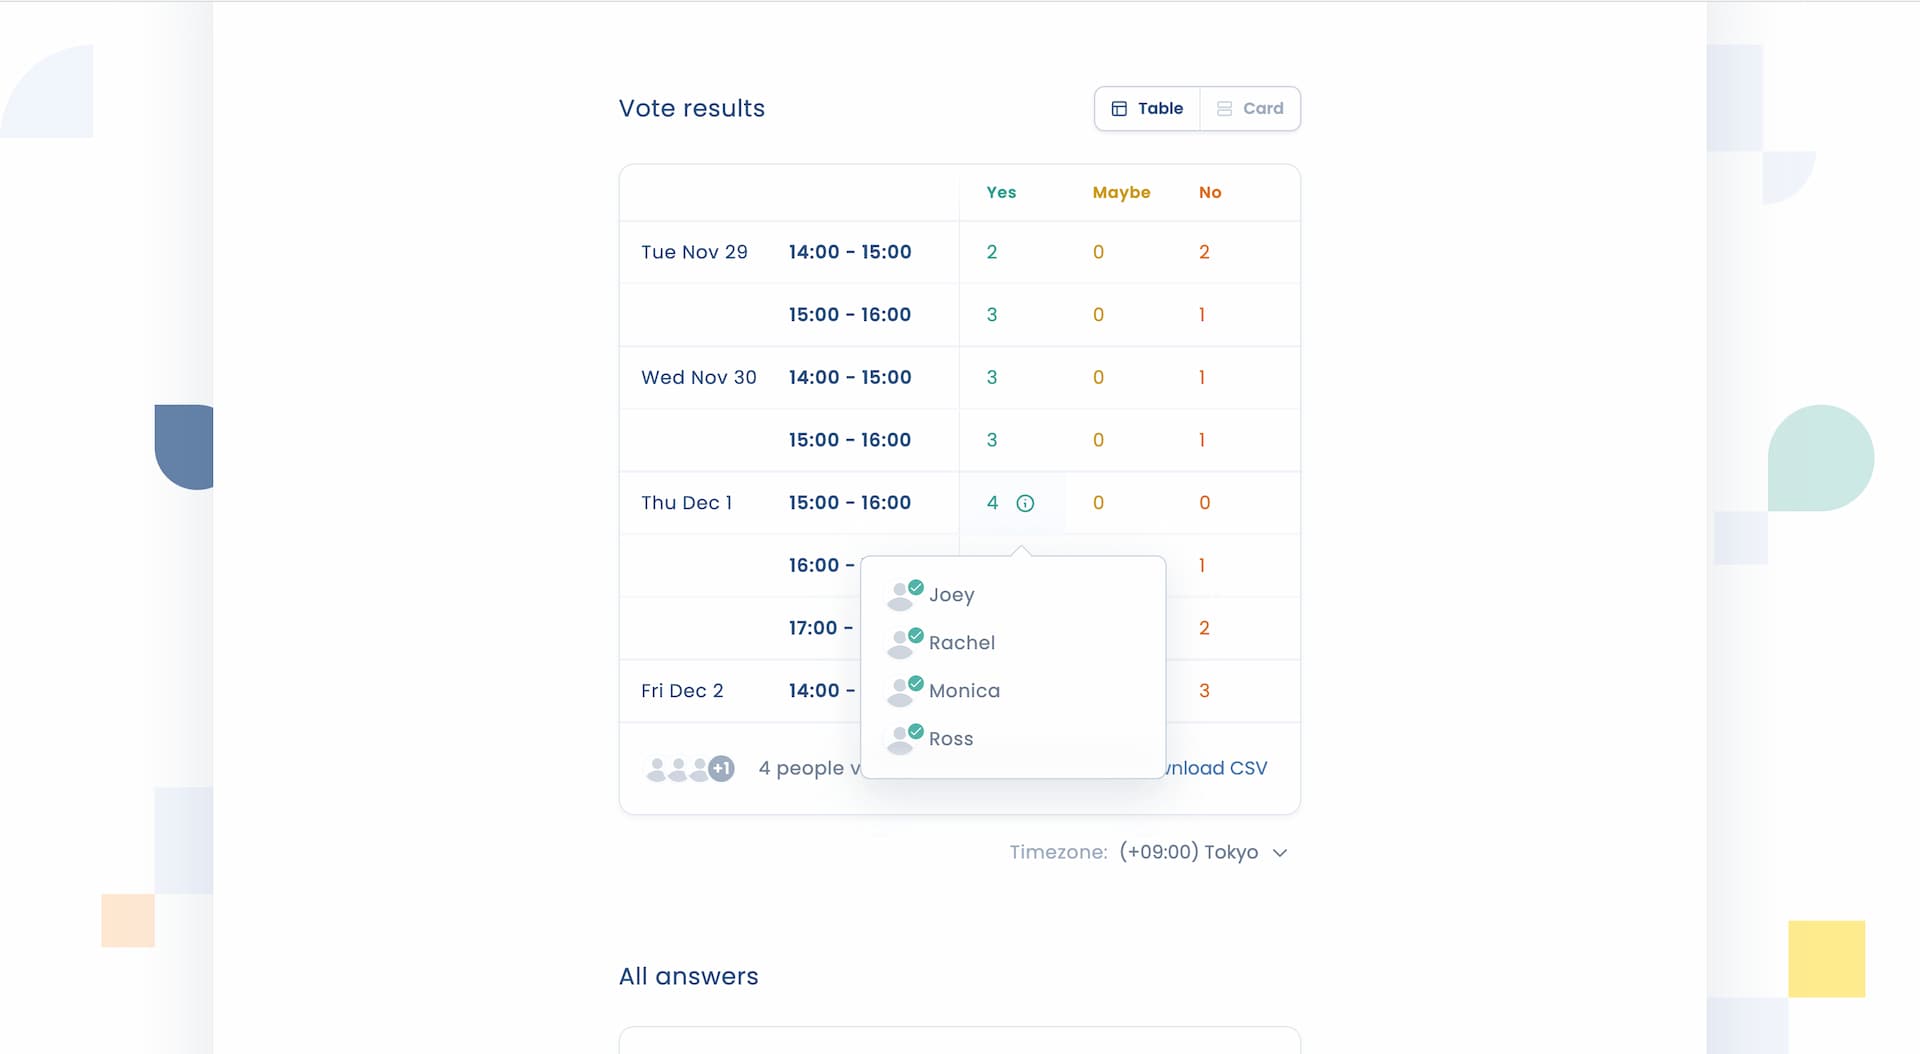
You can even switch view mode between Table 👆 and Card 👇.

By the way, everything works on mobile beautifully.
Hope this step-by-step guide helps you understand how Attendar can make group scheduling easy and efficient with its Availability Poll.
Feel free to play around with it 👇 Again, no sign-up required!